Governance
The Governance feature is Agent Lab's programmatic control layer for agentic Ai responses. It defines what an agent is allowed to do, what facts must be available, which policies must be checked, and when a human must be involved before execution continues.
The key idea is simple: the agent proposes an action and extracts facts, but Governance decides whether that action can proceed. This keeps business execution controlled, auditable, and policy-driven instead of leaving approval decisions only to the AI model.
Governance allows your agent to:
- The agent identifies the action it wants to perform.
- Required and optional facts are extracted from the user request, context, tools, or outputs.
- Agent Lab validates the selected action and facts against the configured governance contract.
- Active Policy Rules are evaluated by priority.
- Governance returns a decision: Allow, Warn, Ask Human, Block, or Then.
- The action proceeds only according to that decision.
Enabling Governance
- Open the agent.
- Go to the Governance tab.
- Click Enable Governance.
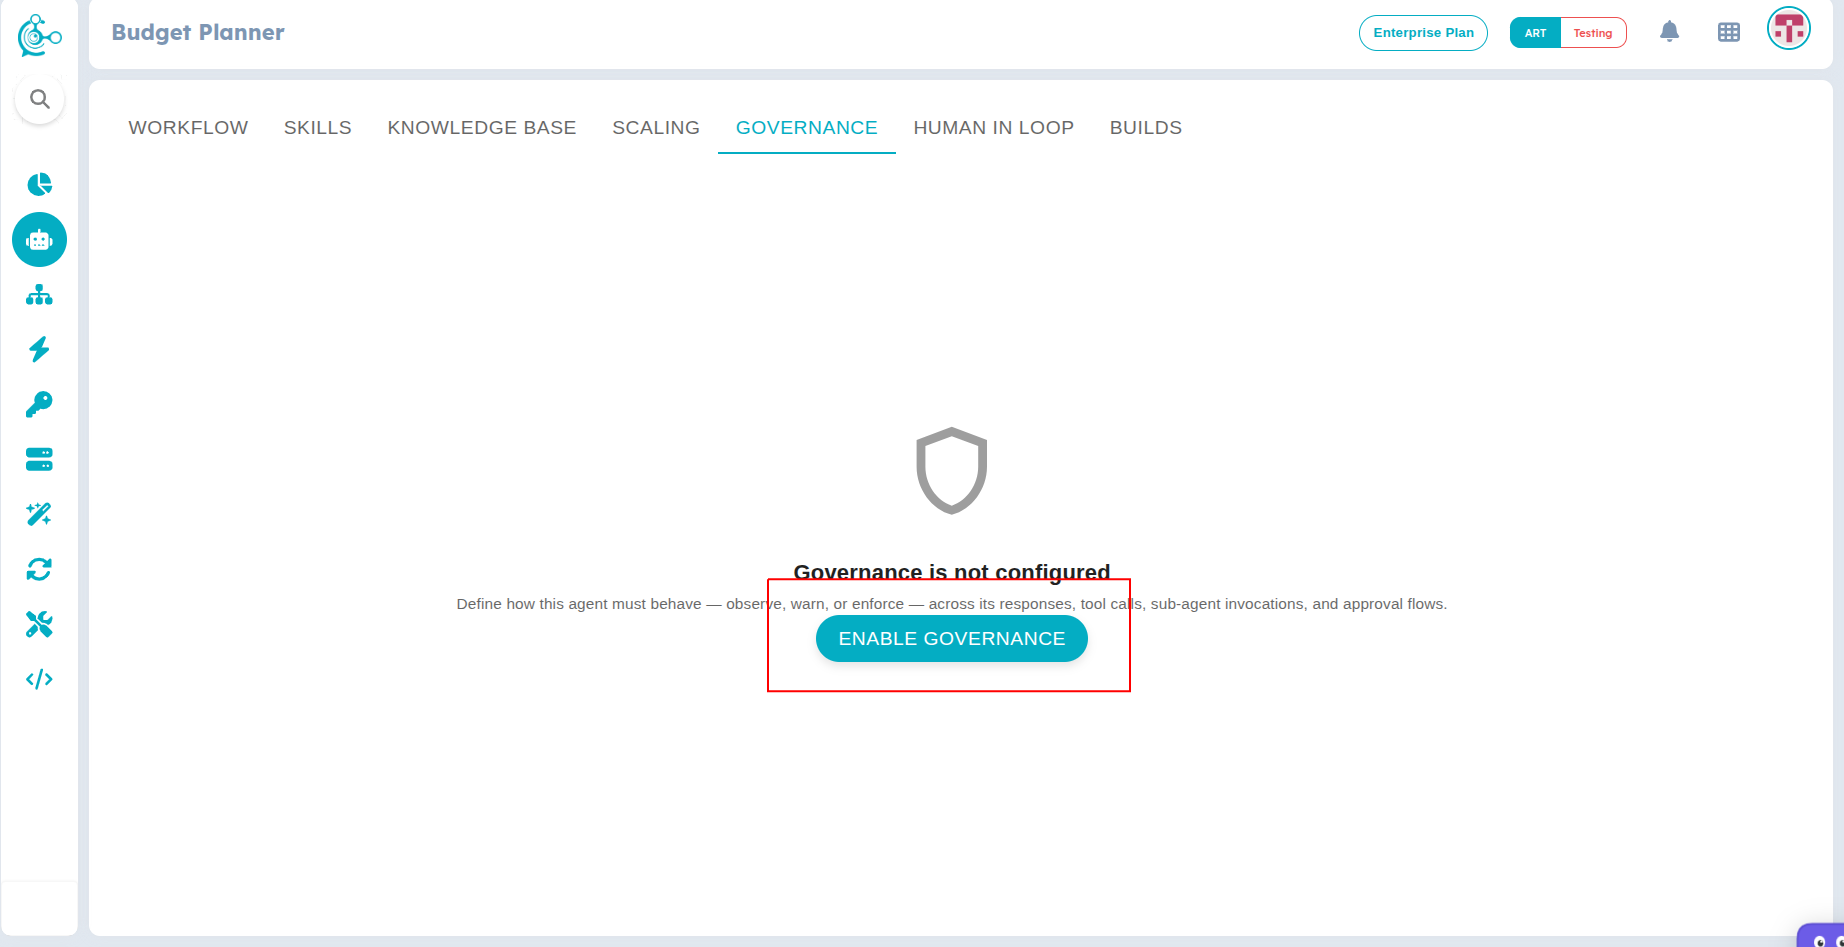
Figure 1: Enable Governance
Governance Modes
After governance is enabled, the Governance dashboard shows the main configuration areas:
- Action Registry
- Fact Library
- Policy Rules
The dashboard also provides Preview Contract, which shows the compiled governance/extraction contract injected into the agent at build time.
The Governance Mode determines what happens when a rule is triggered:
- Observe Only: Logs violations but never blocks the action. Use for rollout and analytics.
- Warn: Surfaces a warning to the caller, but the action still proceeds.
- Enforce: Blocks the action and returns an error to the caller.
Apply to
Select which areas of the agent's operation the governance rules apply to:
- Agent Response: Govern the natural-language response the agent returns.
- Tool Calls: Govern function/tool invocations the agent issues.
- Agent Invocation: Govern when this agent calls another agent.
- Human Approvals: Govern approval prompts requested from a human.
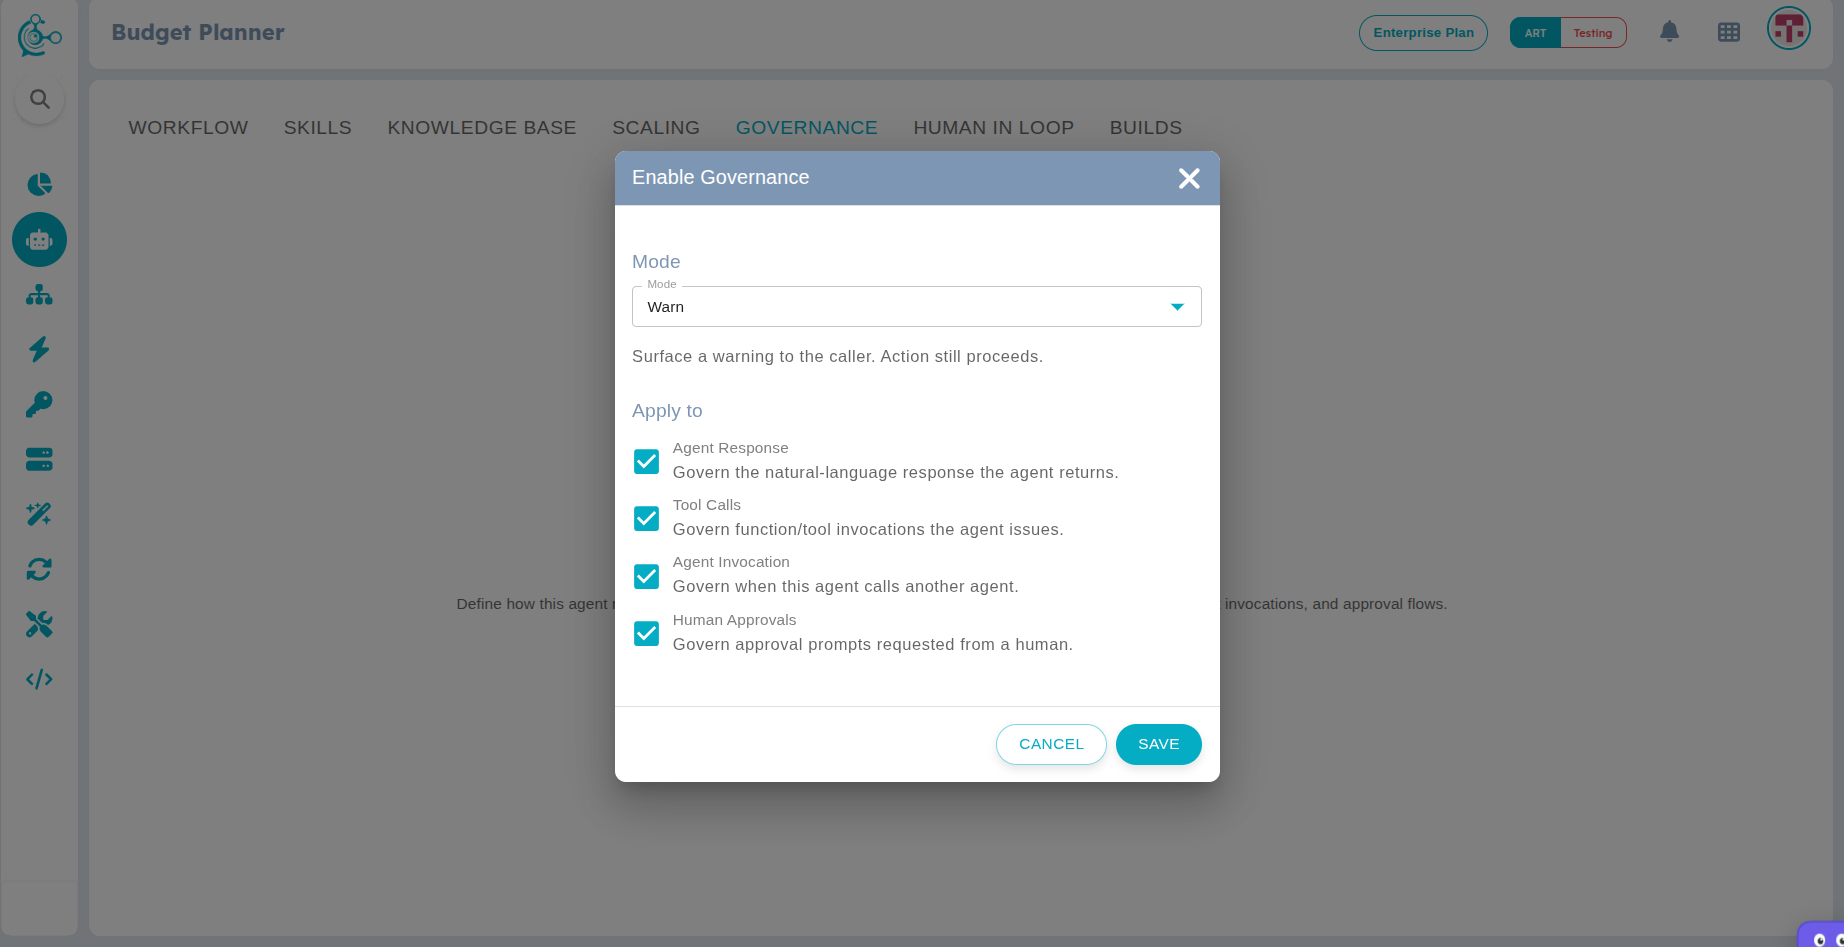
Figure 2: Governance Settings
Governance Configuration
Once enabled, you will see the active Mode and Application areas at the top. Below, you can configure the core components of Governance.
Action Registry
The Action Registry defines what this agent is allowed to do. Each action carries its risk level, execution mode, and the facts the runtime needs to invoke it.
To create an action:
- Click Configure on the Action Registry card, then click CREATE ACTION.
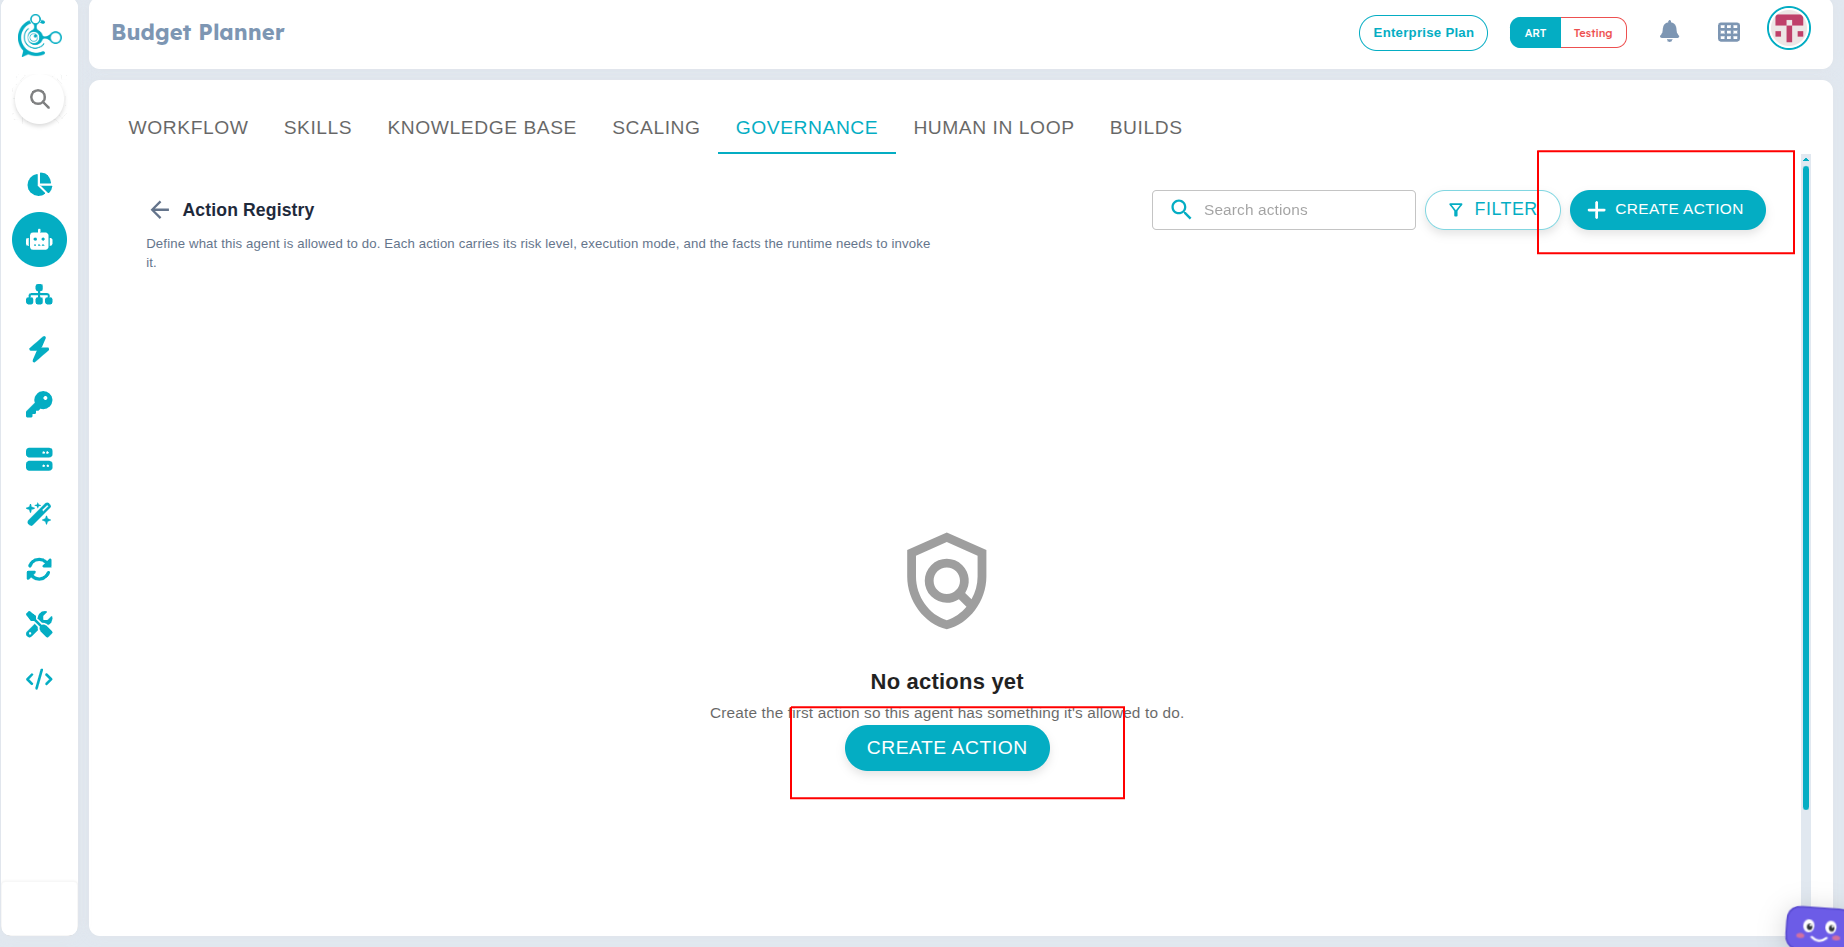
Figure 3: Action Registry
- Fill in the required details:
- Action name: A unique identifier for the action (e.g., Issue Refund).
- Status: Toggle between Active or Inactive.
- Description: What does this action do, and when should the agent invoke it?
- Tags: Free-form labels for grouping in dashboards and reports.
- Select the Capability Type:
- Custom: A generic capability with no binding (LLM-only step).
- Tool Action: Invokes a specific tool — a tool must be selected.
- Sub-Agent: Invokes another agent — a target agent must be selected.
- Skill: Uses a versioned skill — a skill must be selected.
- Set the Execution & limits:
- Risk level: Choose between Low, Medium, High, or Critical.
- Execution mode: Choose between Sync (inline, response is awaited), Async, or Workflow.
- Timeout (seconds): Set a maximum execution time.
- Define the Facts:
- Required facts: Facts pulled from the Fact Library that drive runtime extraction and missing-fact detection.
- Optional facts: Facts that are useful but not strictly required to execute the action.
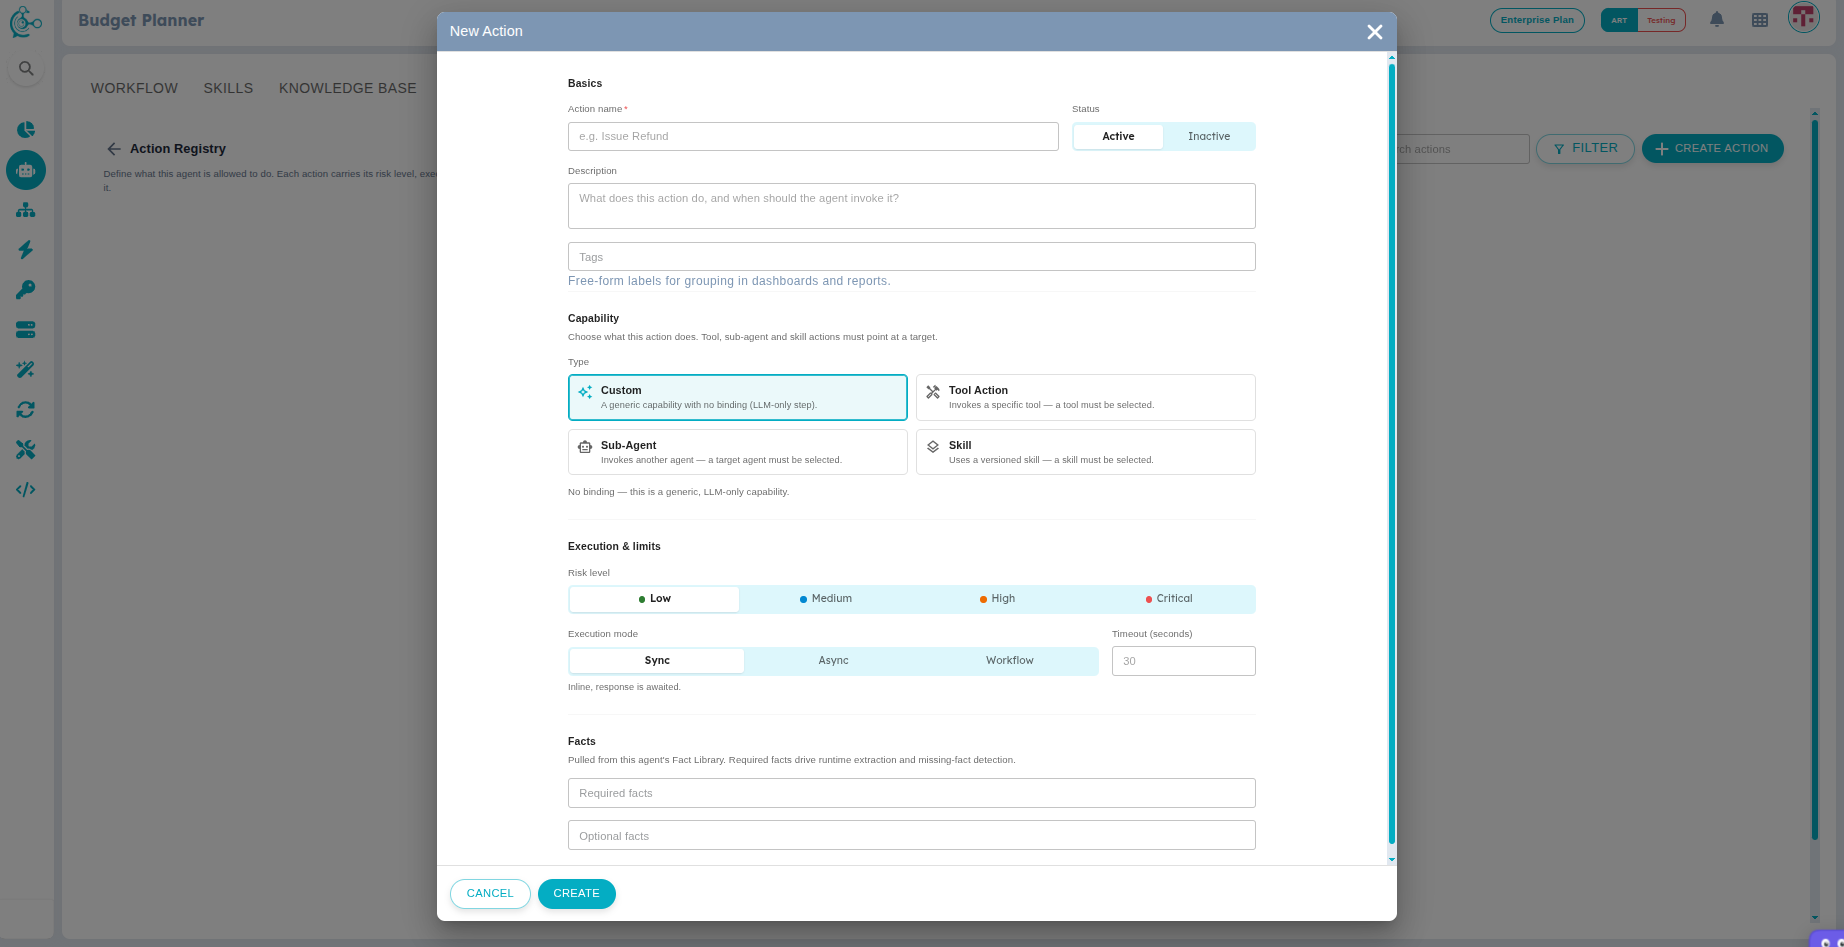
Figure 4: New Action
Fact Library
The Fact Library stores reusable fields that this agent can reference. Actions and policy rules pull from these facts at runtime, so it is important to keep keys stable so downstream references don't break.
To create a new fact:
- Click Configure on the Fact Library card, then click ADD FACT.
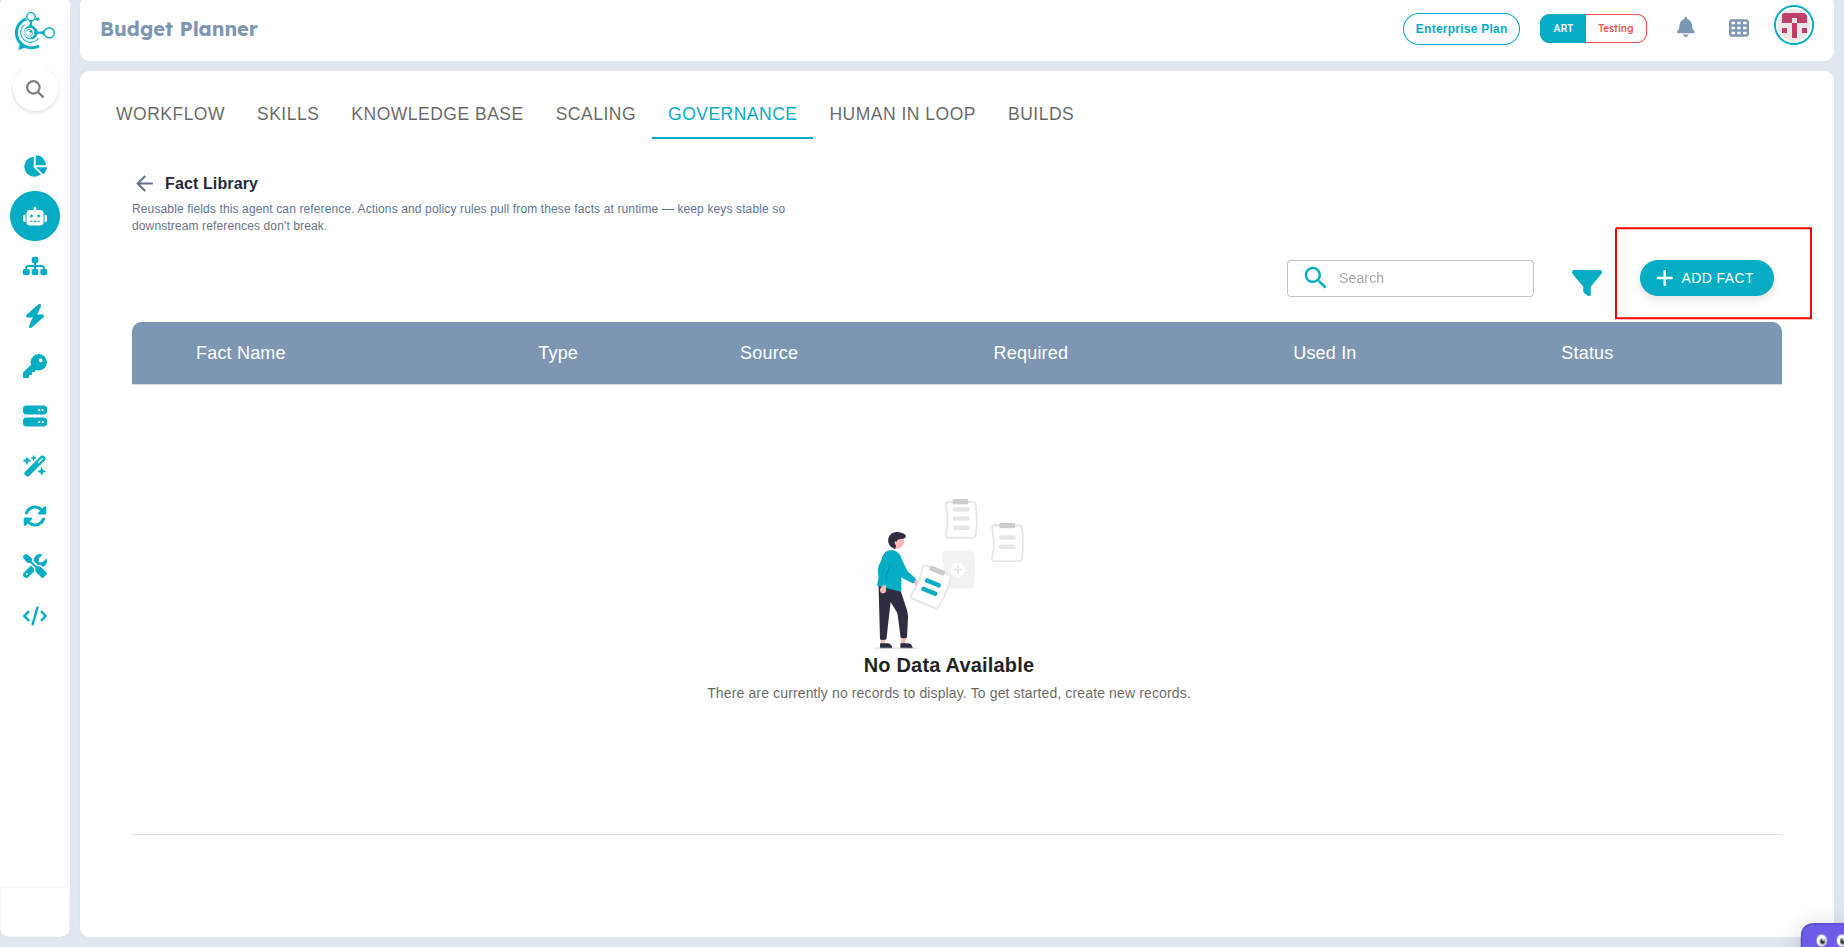
Figure 5: Fact Library
- Fill in the required details:
- Fact name: A user-friendly name for the fact.
- Key: A unique programmatic key for referencing this fact.
- Type: Select the data type (e.g., String).
- Description: Explain what this fact represents.
- Required at runtime: Toggle whether this fact must be present when the agent runs.
- Status: Toggle between Active or Inactive.
- Default value (optional): Set a fallback value if one isn't provided at runtime.
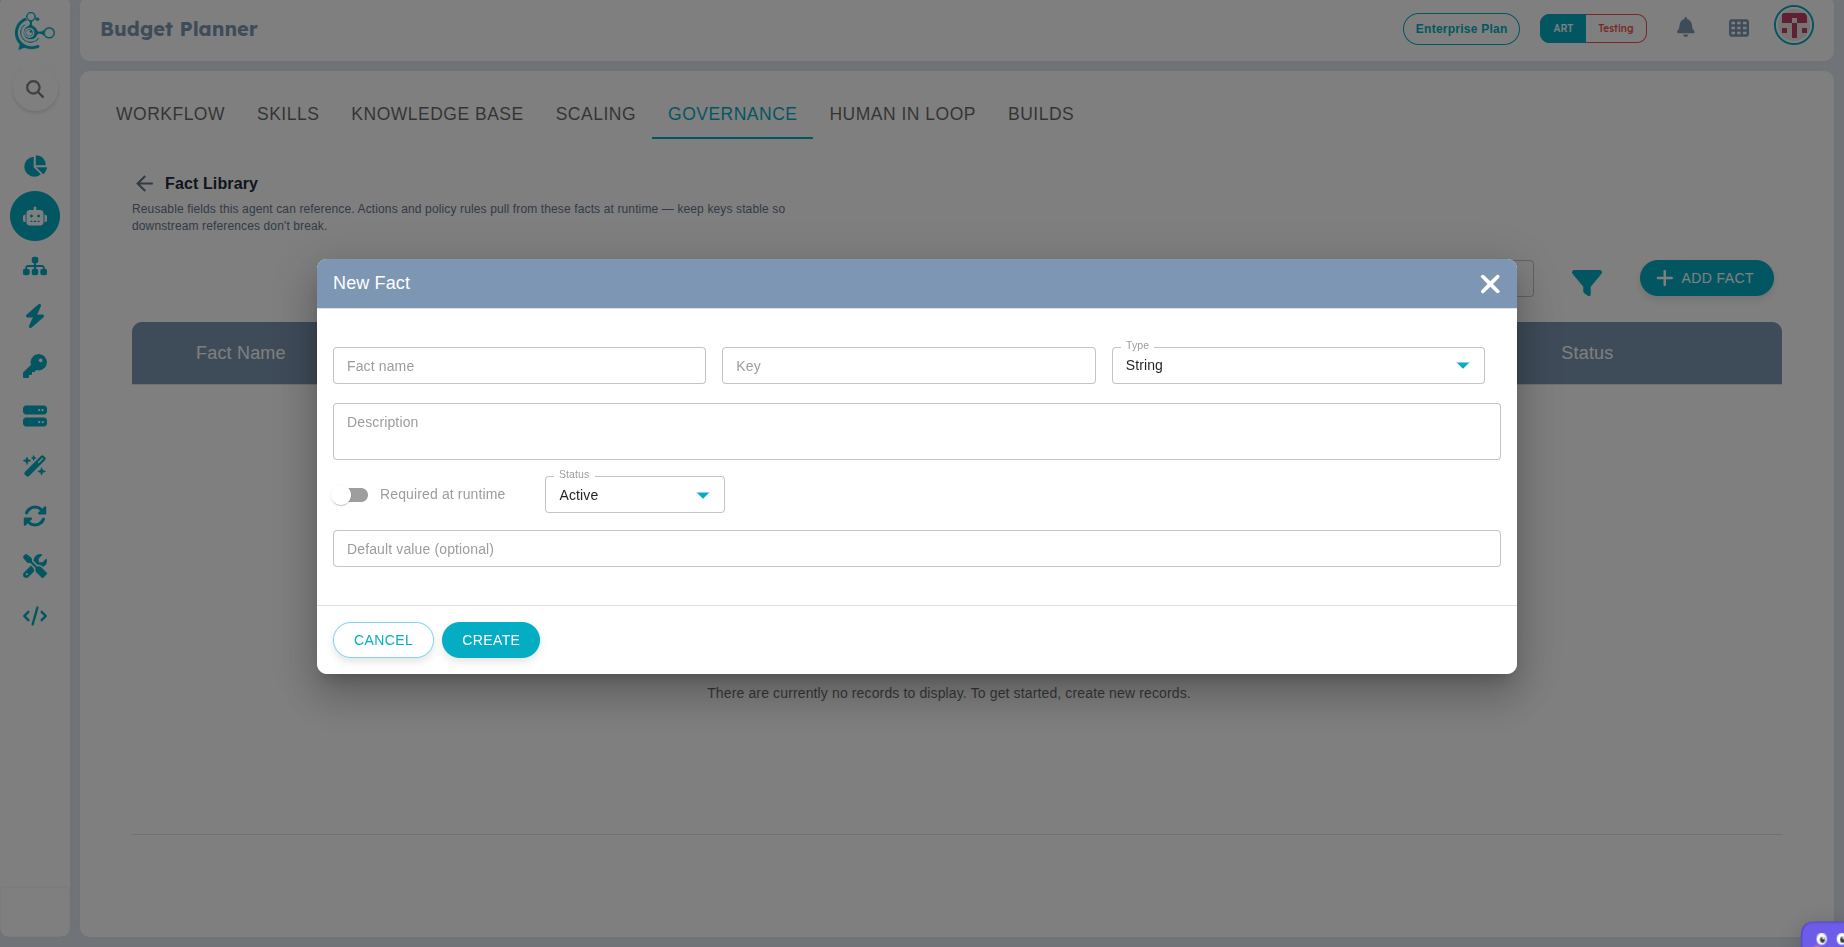
Figure 6: New Fact
Policy Rules
Rules connect facts and actions to a governance decision. The runtime evaluator iterates through active rules by priority (highest first) and returns the first matching rule's decision.
To create a rule:
- Click Configure on the Policy Rules card, then click CREATE RULE.
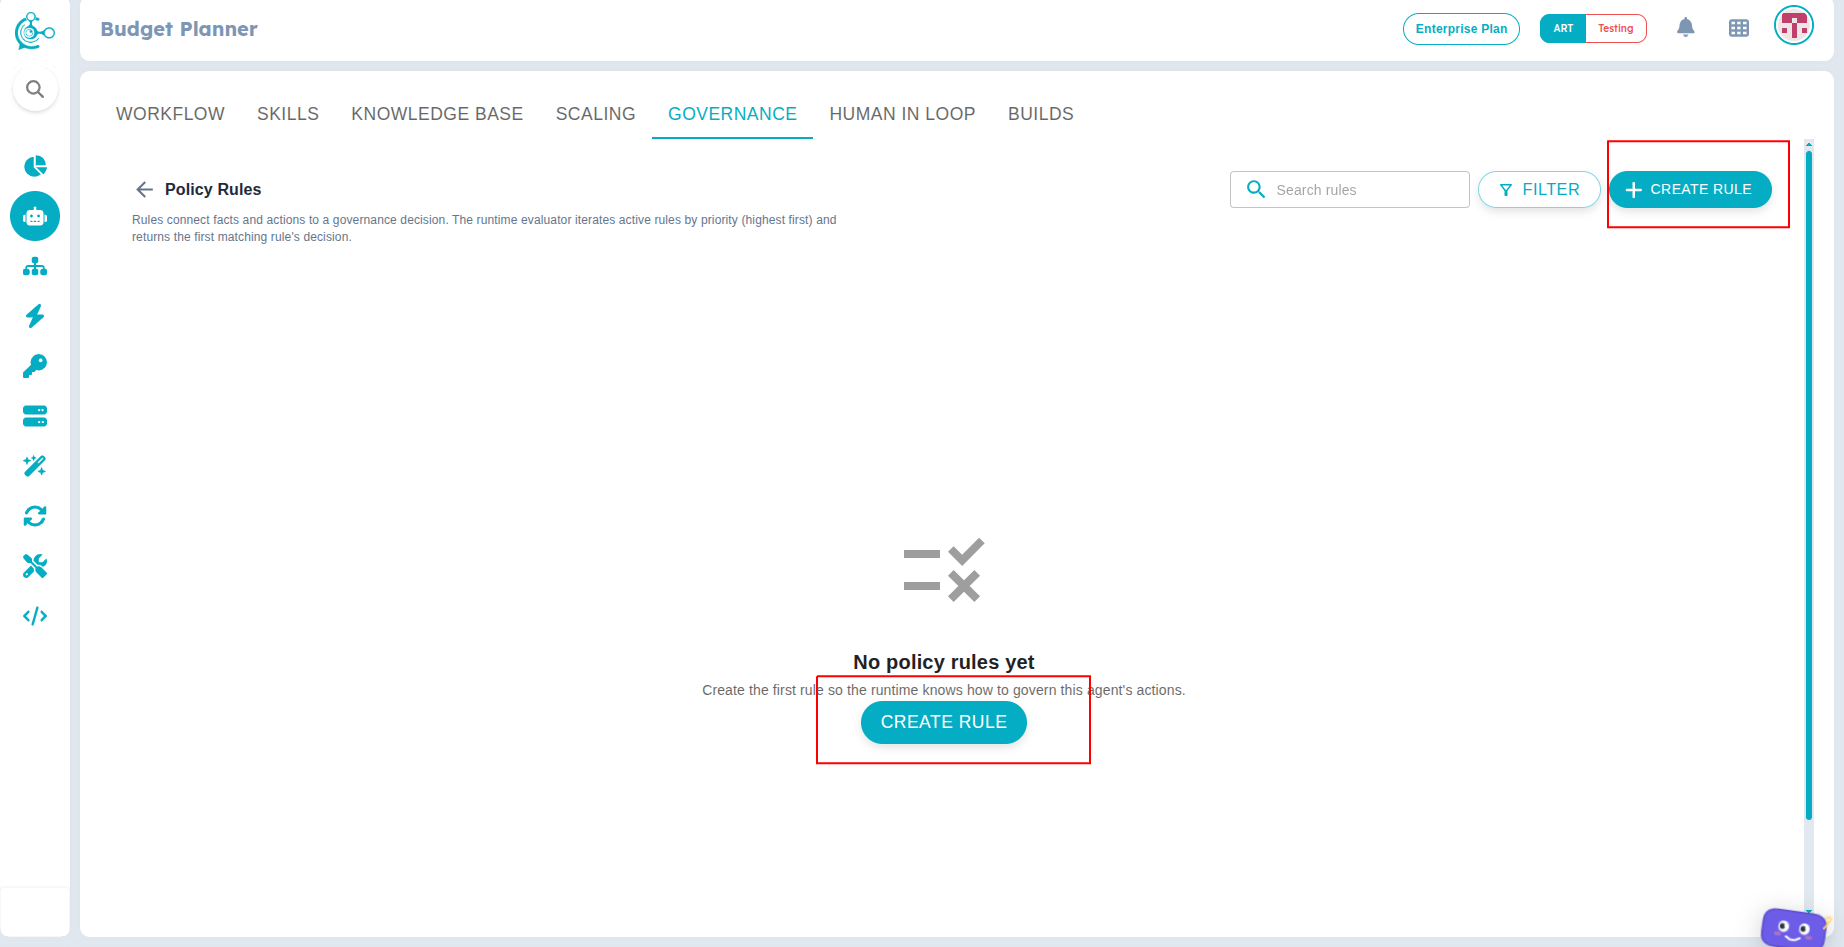
Figure 7: Policy Rules
- Fill in the Basic details:
- Rule Name: A descriptive name for the rule.
- Priority Tier: Determines the evaluation order (e.g., Normal - Default tier for most governance rules).
- Fine-tune (±): Optionally adjust priority within the selected tier.
- Description: Explain what this rule enforces.
- Status: Toggle between Active or Inactive.
- Set the Trigger:
- Action: Choose which action this rule applies to. The rule only fires when the LLM picks this action AND the conditions below match.
- Match: Select whether to match All (AND) or Any (OR) conditions.
- Define the Conditions:
- Select a Fact, an Operator (e.g., Equals), and a Value. You can still type a fact key by hand if it isn't registered yet.
- Use + Add condition or + Add group to build more complex logic. Tip: only facts declared on the selected action appear in the dropdown.
- Set the Decision:
- Decision: Choose the outcome if the conditions are met (e.g., Allow, Warn, Block, or Ask Human).
- Reason / Message: Provide a custom message or explanation to accompany the decision.
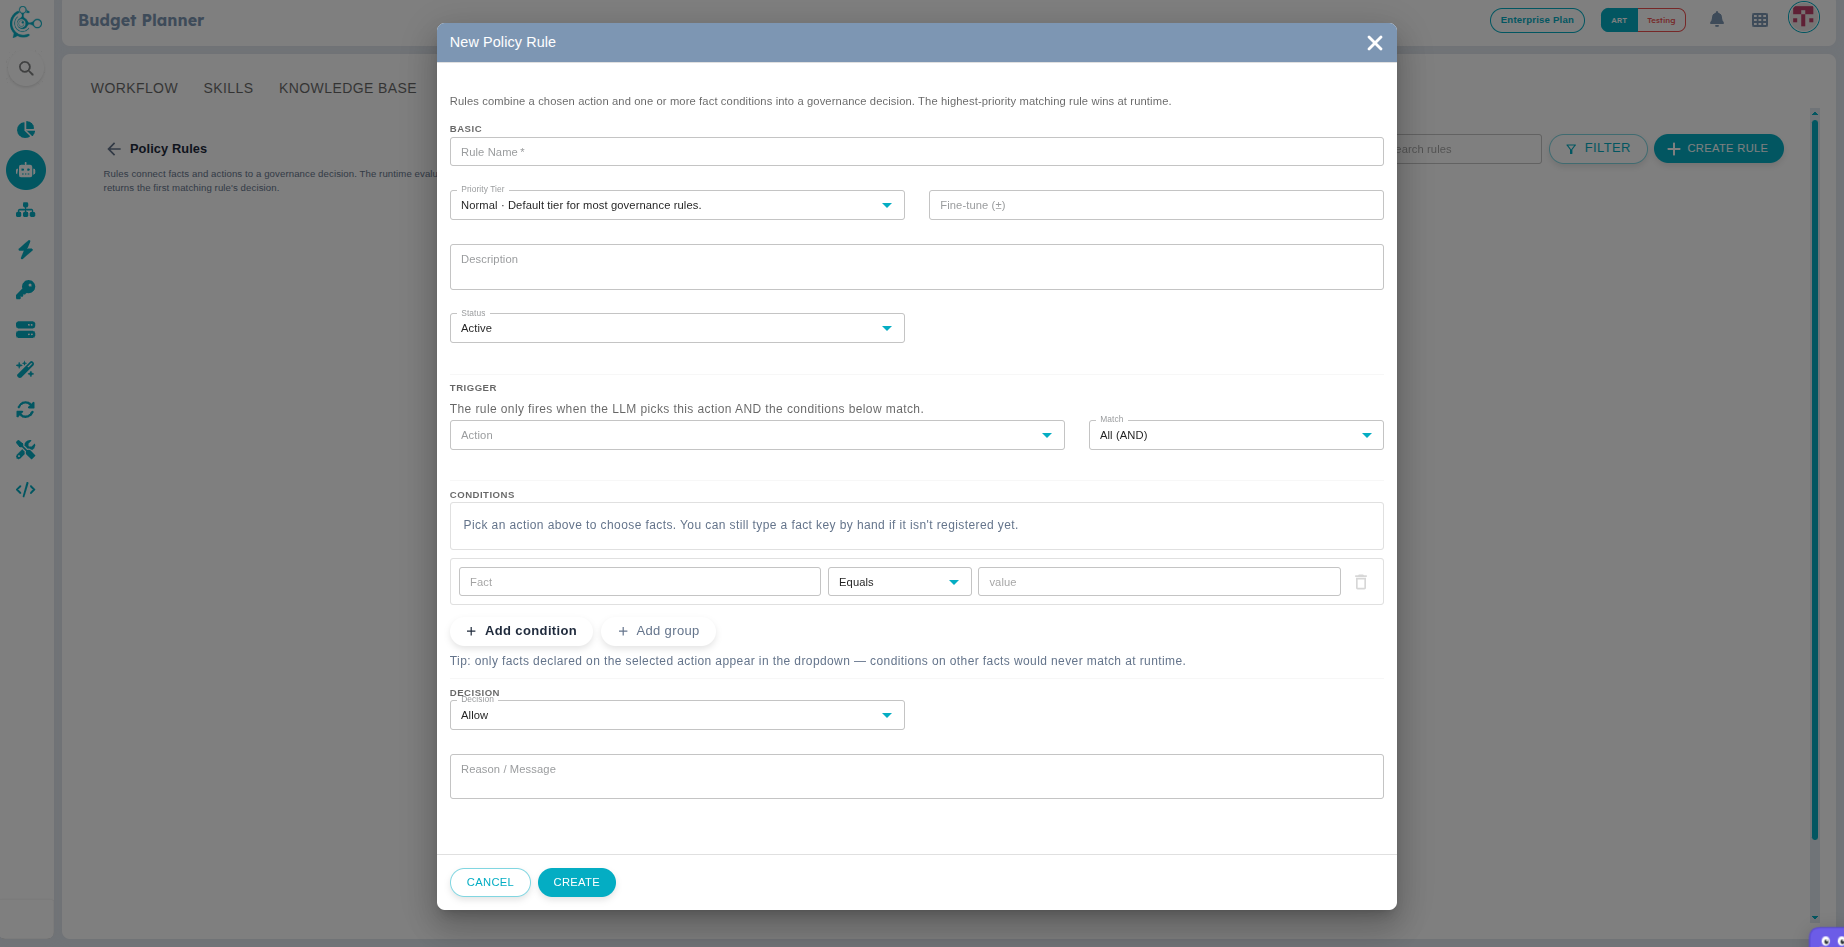
Figure 8: New Policy Rule
Human In Loop (HIL)
Human-in-Loop configs define how a human is involved when a Policy Rule requires manual intervention. This can include actions like approve, give feedback, supply information, be informed, or escalate.
While you can create Human-In-Loop configurations at any time, they are only triggered during an agent's execution if a Policy Rule is evaluated and its decision is set to Ask Human. The agent will pause its workflow and trigger the specific HIL configuration referenced by that rule.
To set up a Human In Loop configuration:
- Navigate to the HUMAN IN LOOP tab in your agent's dashboard.
- Click CREATE to configure your first human-in-the-loop approval flow.
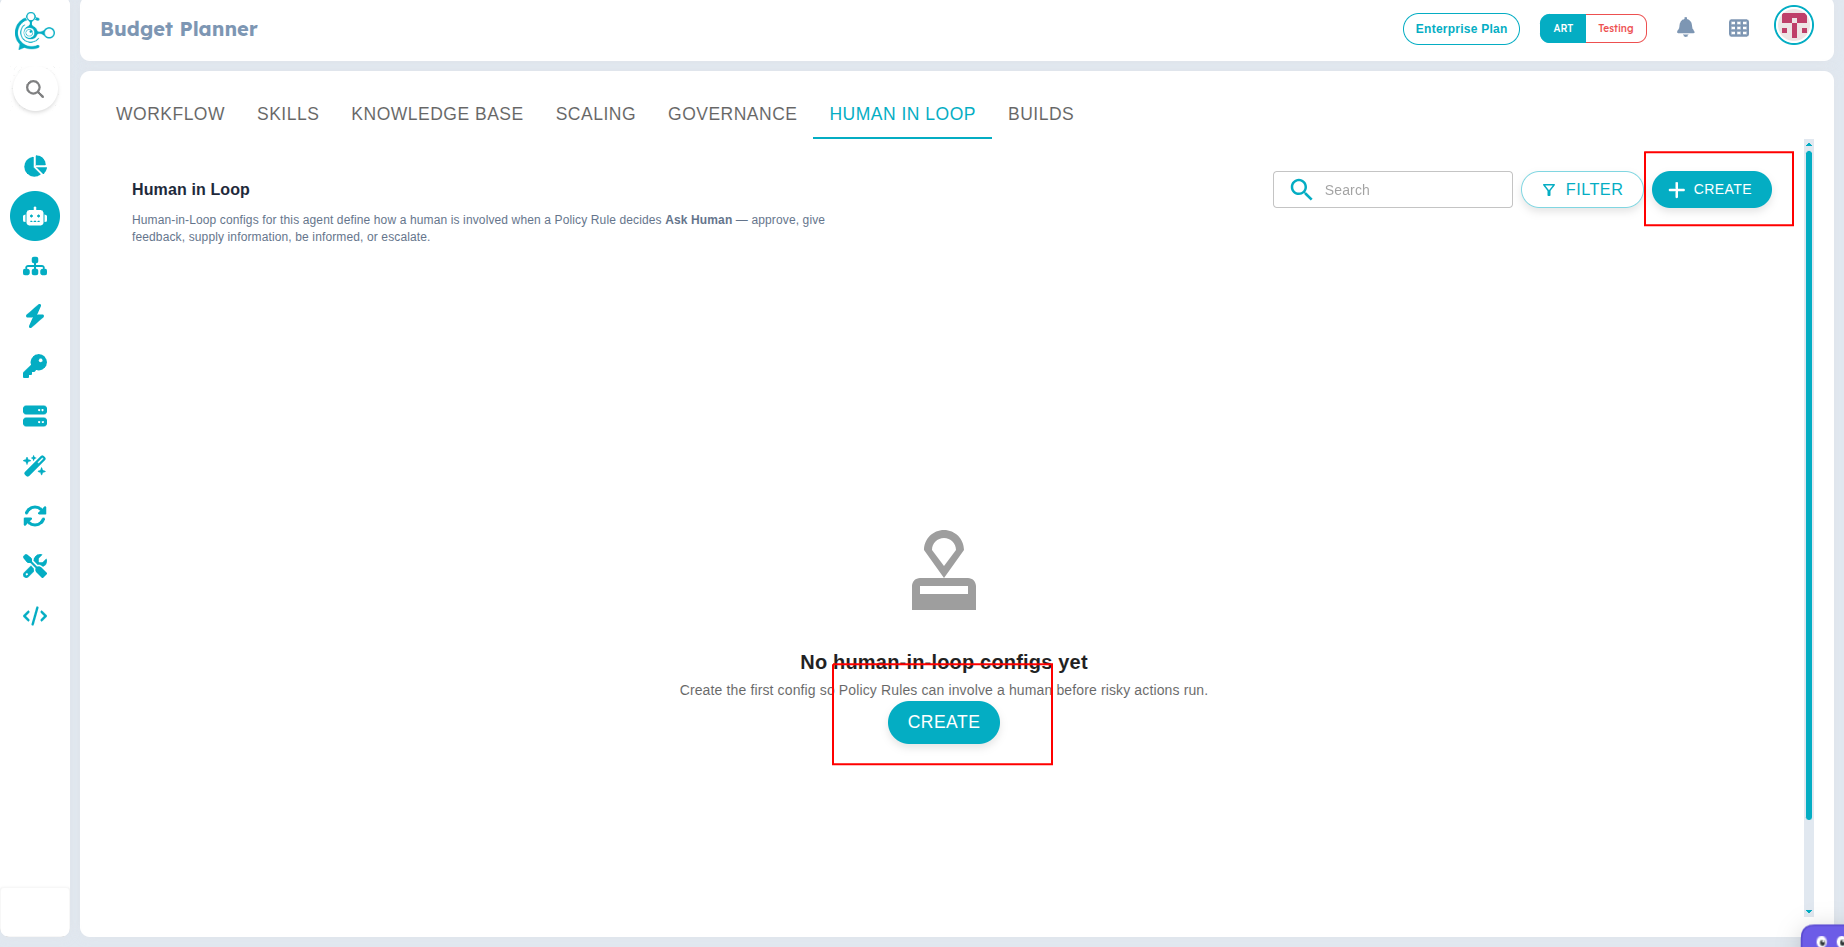
Figure 9: Human In Loop
- Fill in the Interaction type:
- Type: Choose the type of human involvement (e.g., Approval, Feedback, Information, Inform / Update, Escalate). For example, Approval means a human approves or rejects before the action runs.
- Fill in the Basics:
- Title: A clear name for the config (e.g., Finance Refund Approval).
- Status: Toggle between Active or Inactive.
- Description: Detail what this config is for, and which rules should reference it.
- Define the Participants:
- Approver type: Choose who can respond: Role, User, Group, or Anyone.
- Approvers: Select the specific roles, users, or groups that need to be involved. Active configs must list at least one participant.
- Approval mode: Determines how many responses the runtime needs (Any one, All, Majority, Quorum).
- Configure the Timeout:
- Timeout (minutes): How long to wait before the timeout action is triggered.
- On timeout: Choose the fallback action (Block, Escalate, or Auto-approve).
- Set Approver actions:
- Require a reason from the approver: Check this if approvers must enter a justification when they approve or reject (this will be recorded in the audit trail).
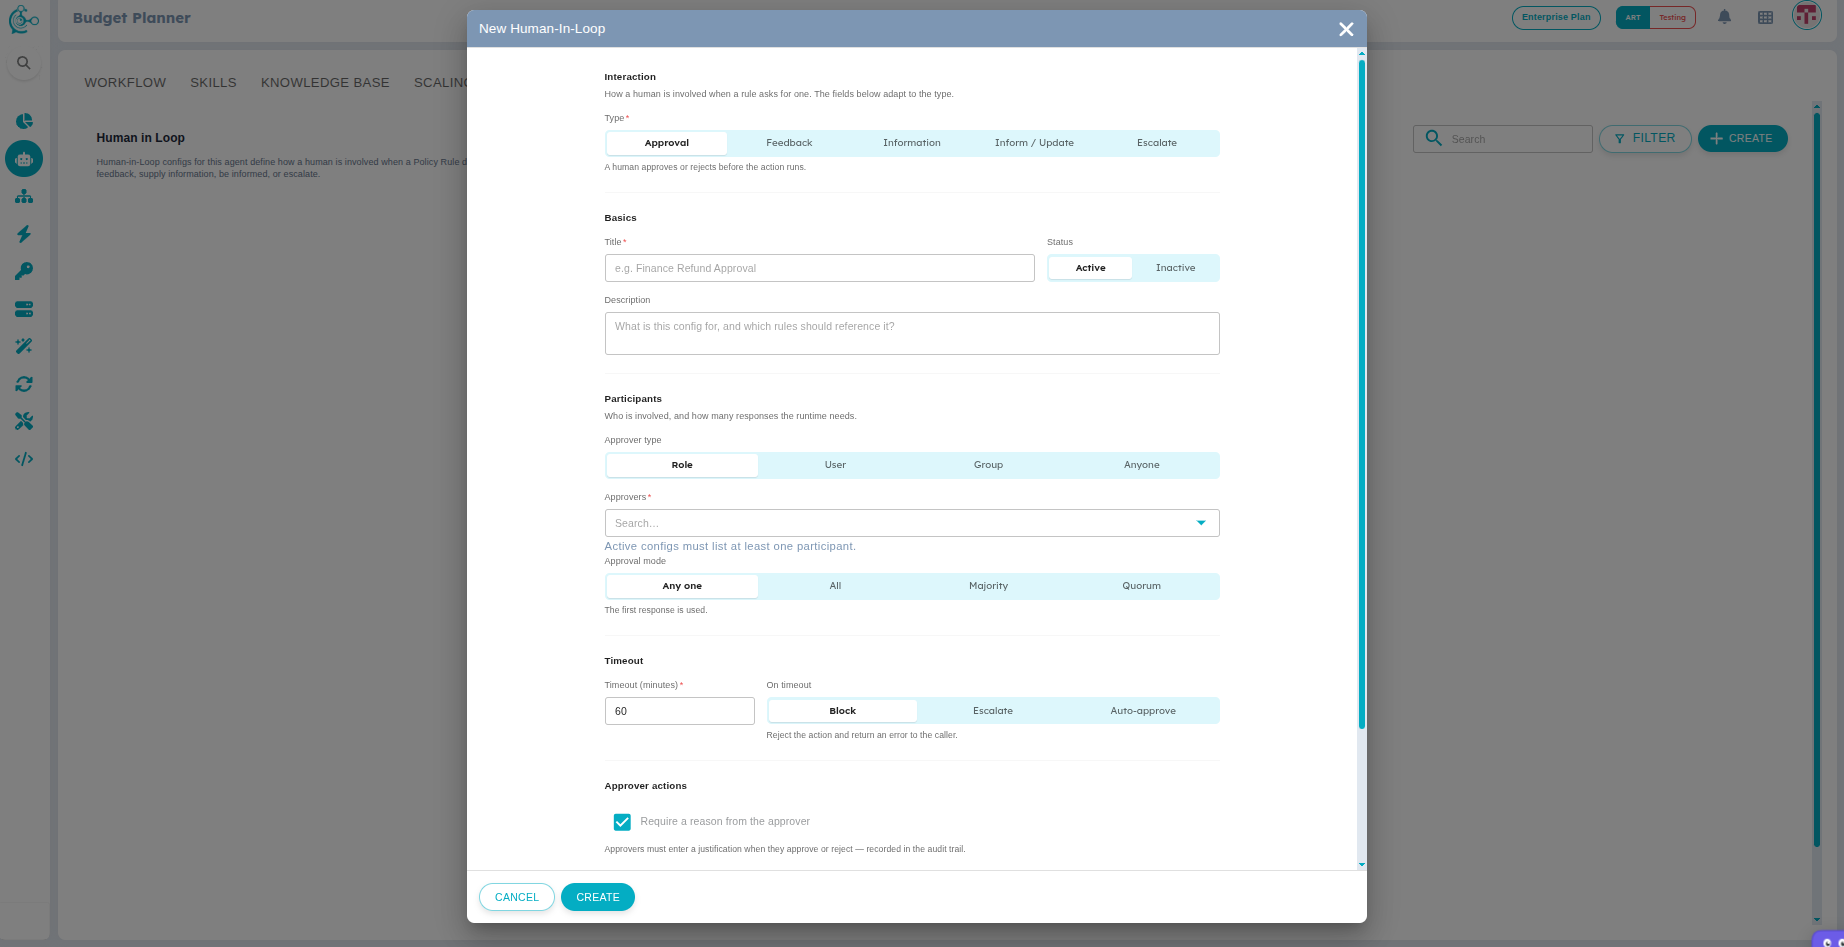
Figure 10: New Human-In-Loop Configuration