Workspace and Project
Creating a Workspace
A Workspace helps organize the projects similar to how a multi-tenant application does. Under each workspace multiple projects can be created and maintained. As a part of registration and onboarding, you create your first workspace which will be the default workspace unless you want to have multiple. You will be able to switch between different workspaces during logging in into your account.
To create a workspace, follow the below steps:
- Access the Add Workspace option from profile icon in the top right corner in the dashboard
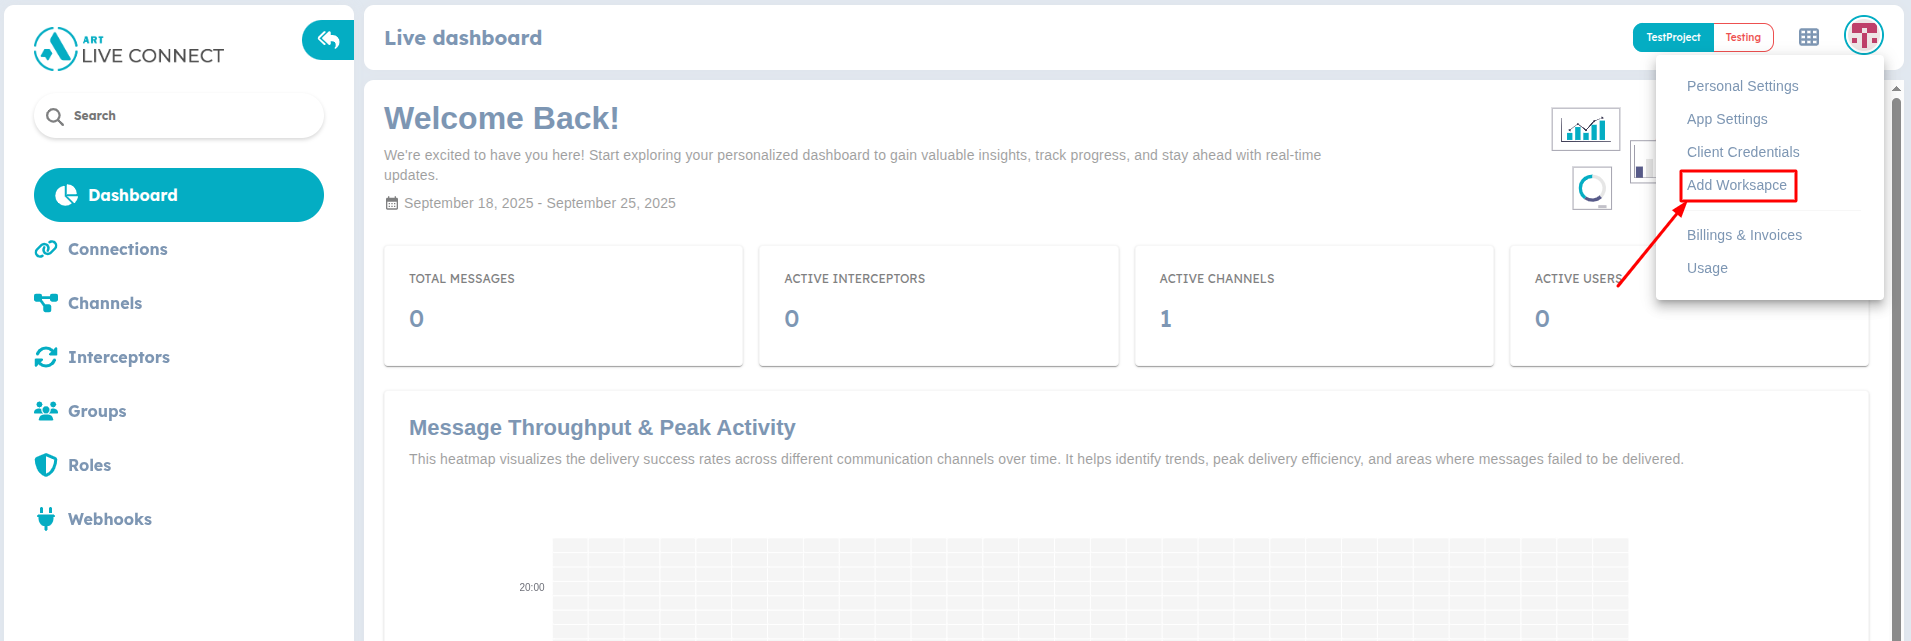
Profile Settings
- Click on the Add Workspace option and you'll be redirected to Workspace creation page.
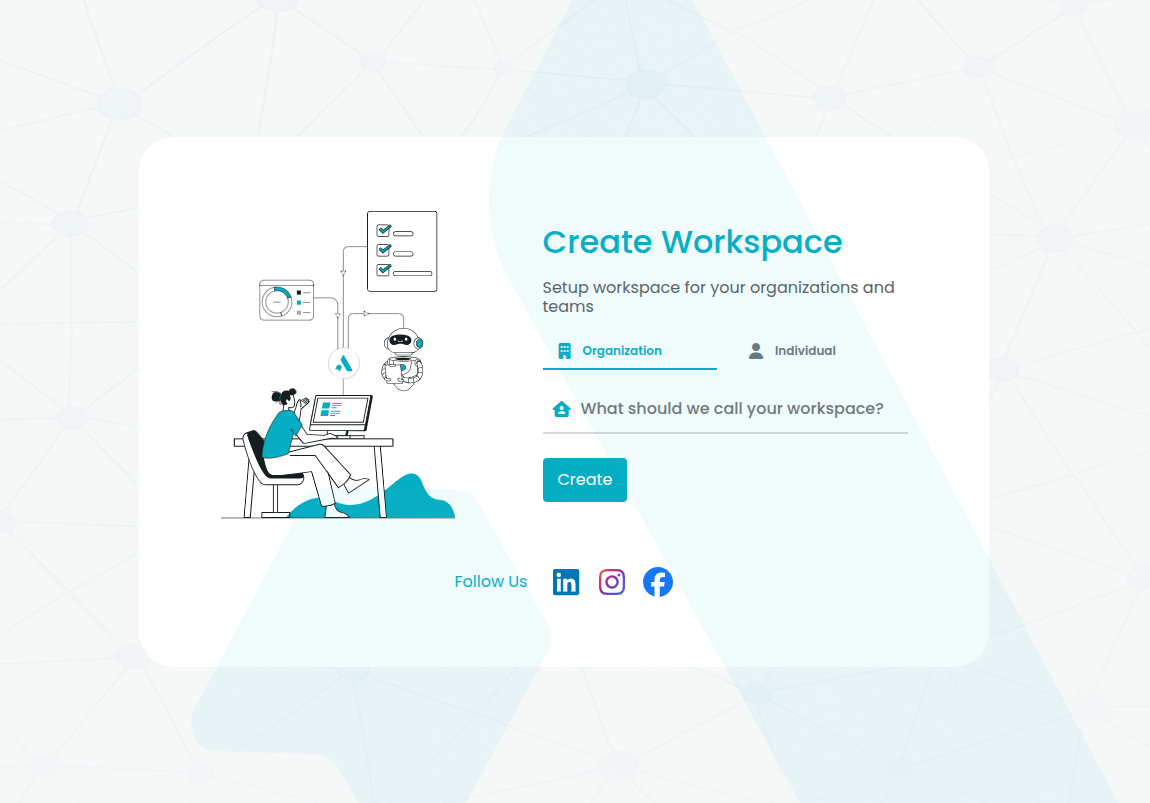
Create Workspace
- Select the type of Workspace you want to create:
- Organization - For groups or teams
- Individual - for solo or personal projects
- Name the workspace you want to create.
- Click on Save Button to create the Workspace.
- You will be redirected to login on successfull creation of Workspace, and the newly created workspace will be available for selection while logging in.
Once the user logs in to a workspace, changing or switching of the same from dashboard is not allowed. You can log out of the application to select the Workspace of your choice and log in again.
User can add the workspace which results in automatic logout from application. Make sure to complete or save any ongoing process before changing the workspace.
Creating a Project
After creating the workspace, while registration, you create your first project and it will be your default project. When you create a Project, a unique ProjectKey is generated. Each project has its own ProjectKey, which is part of the Client Secret Key and is required to authenticate and authorize the project when integrating with ART.
You can add more projects to your selected workspace or switch between the projects from Live Connect Dashboard.
You can create a new project by following these steps:
- Click on the profile icon in the top right corner of the dashboard and select App Settings.
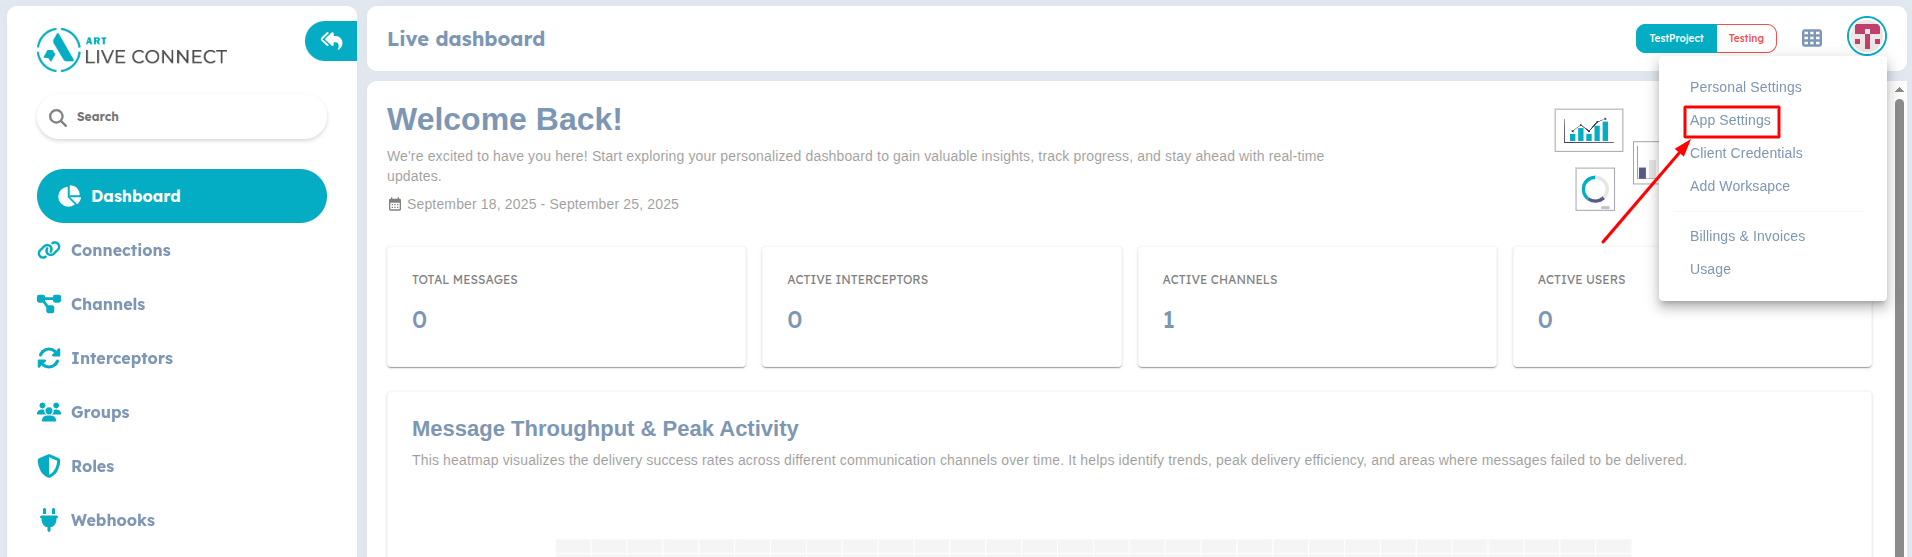
Profile Settings
- Select the Project option from the side menu.
- Click on the +Add button.
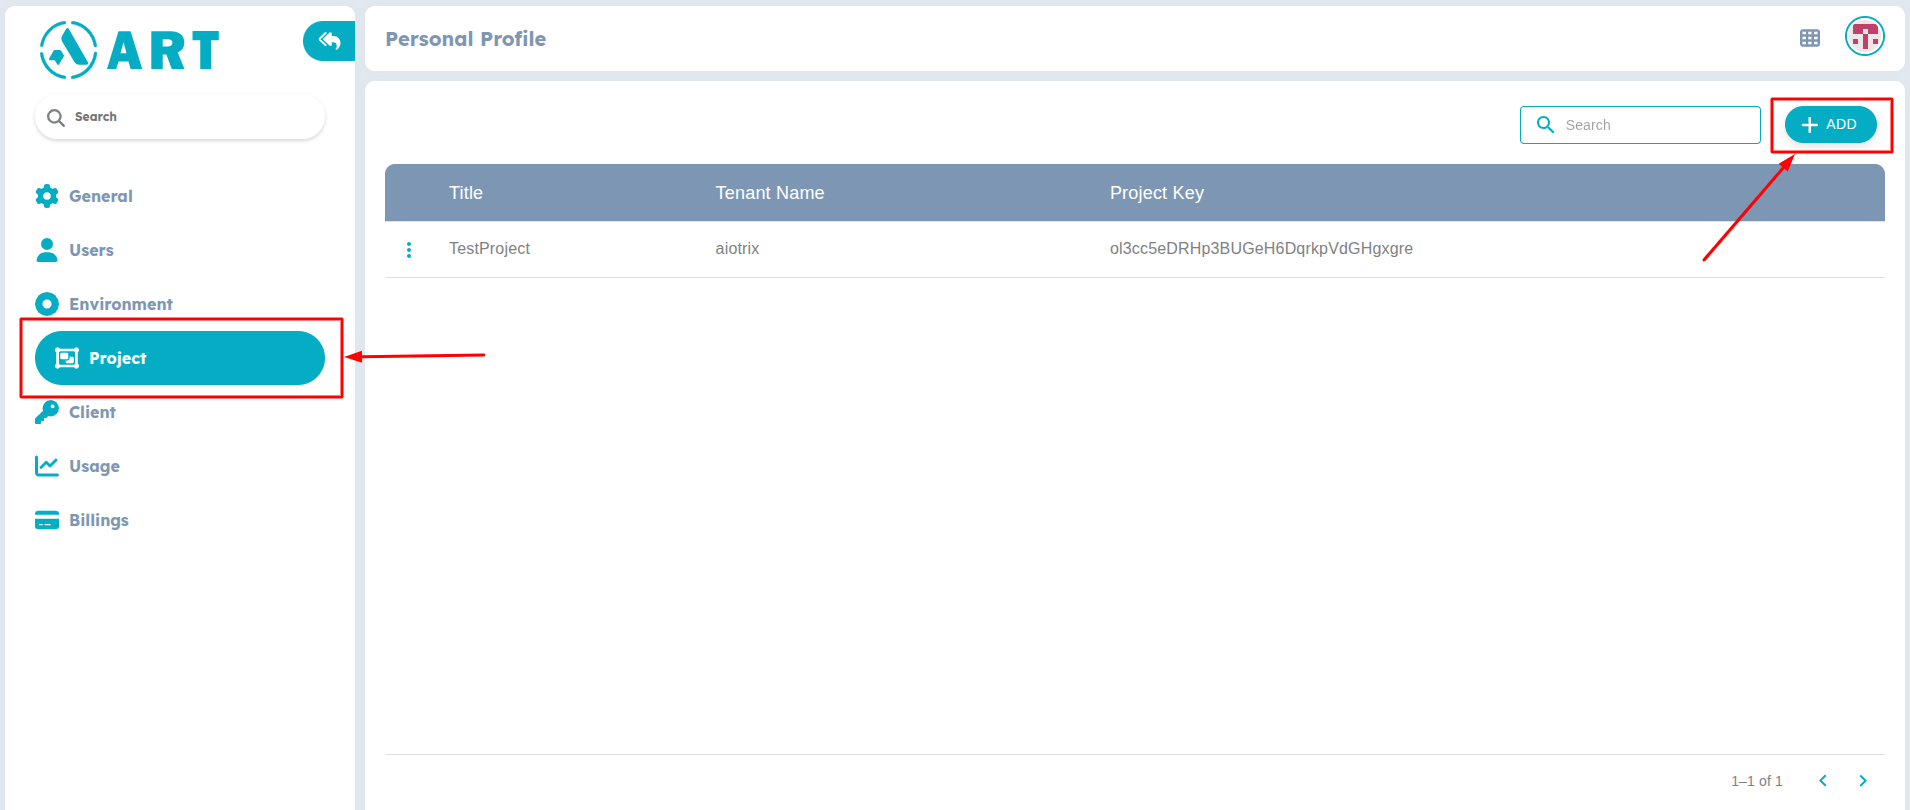
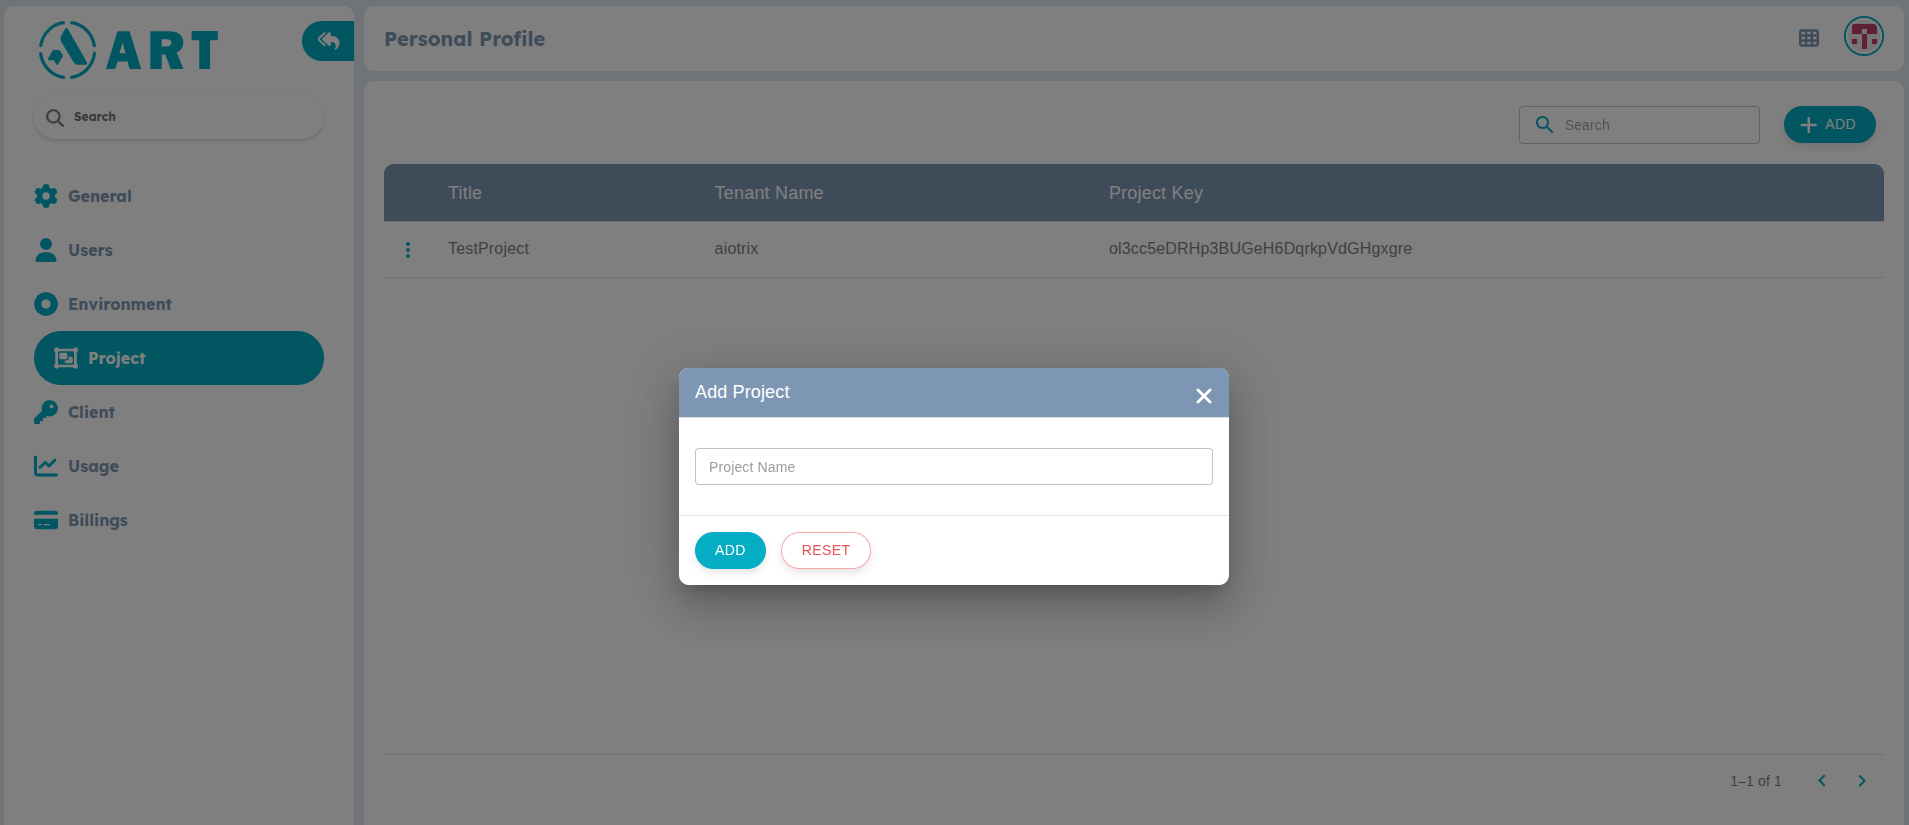
Add Project
- In the popup screen, enter your project name and click Add.
Save Project
- You can copy the ProjectKey of a project from the list manually, and update your adk-service.json file accordingly.
Make sure to login to the appropriate workspace before creating any projects or making any changes to them.
Switching Projects
You can switch between the projects under a specific environment from the General Settings page.
Follow the steps to switch between the list of your projects.
- Click on the profile icon in the top right corner of the dashboard and select App Settings.
Profile Settings
- You'll be navigated to the General Settings related to the application where you can see the Project and Environent options.
- Click on the Project Name to get the list of available projects from which you can select according to your need.
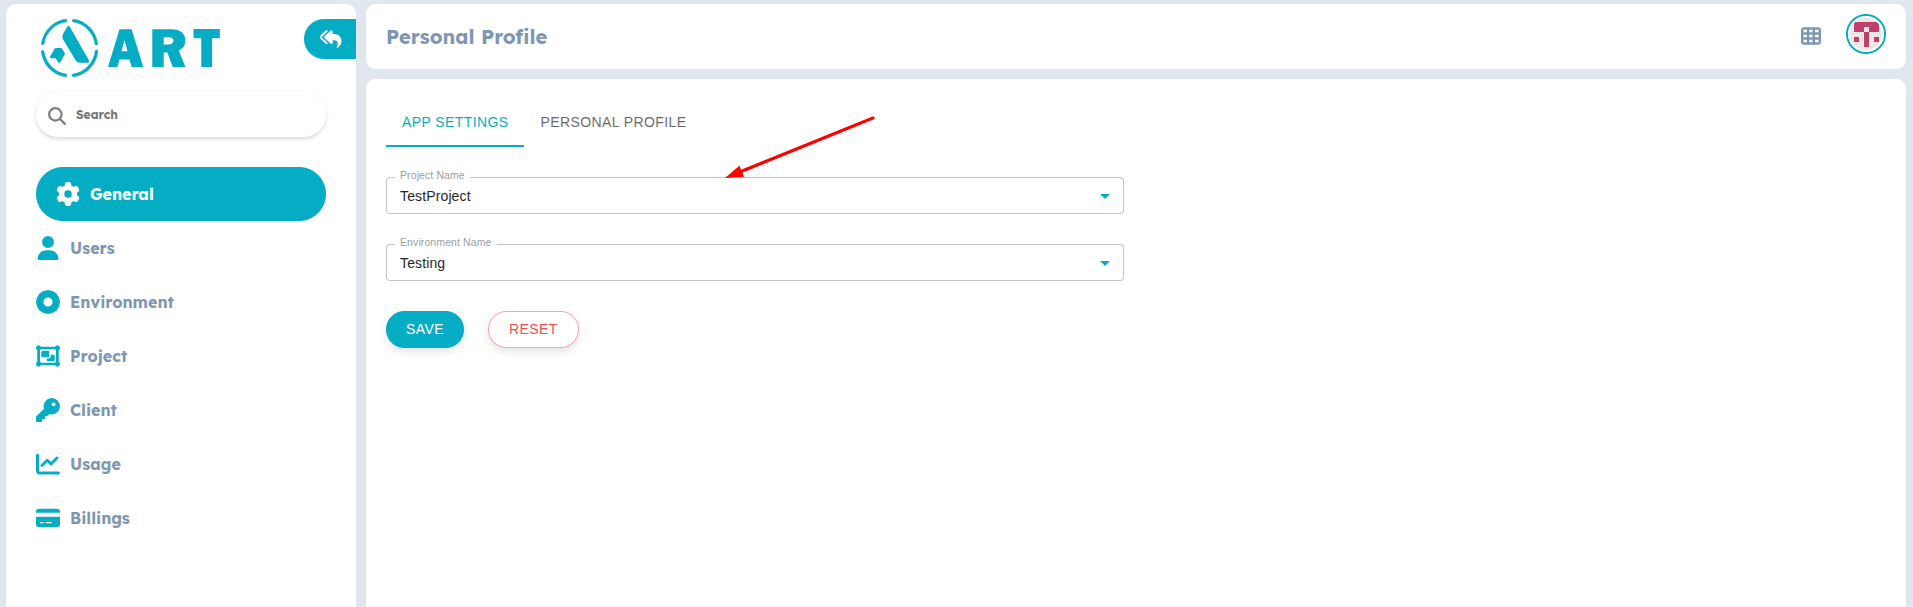
Select Project
- Save the configuartion to apply the changes.
Environment
An Environment represents a specific deployment context within your project, such as development, testing, or production. Each environment provides isolated settings and configurations that allow you to manage different stages of your application lifecycle effectively.
Users cannot create new environments independently. All environment-related operations require administrative approval. To create a new environment submit a request to support@art.com
Environment switching affects your entire project configuration. Ensure all ongoing work is saved and team members are notified before requesting environment changes.