Client Configuration
Generate Client Secret
Client secret is the most crucial part for your aplication to connect with ART services. Client credentials are unique and depending on the roles assigned to them, they can be used to perform certain actions. To proeed creating the credentials follow the following steps:
- Click on the profile icon in the top right corner of the admin console and select Client Credentials or navigate to the App settings from profile icon, click on the Client side-menu item.
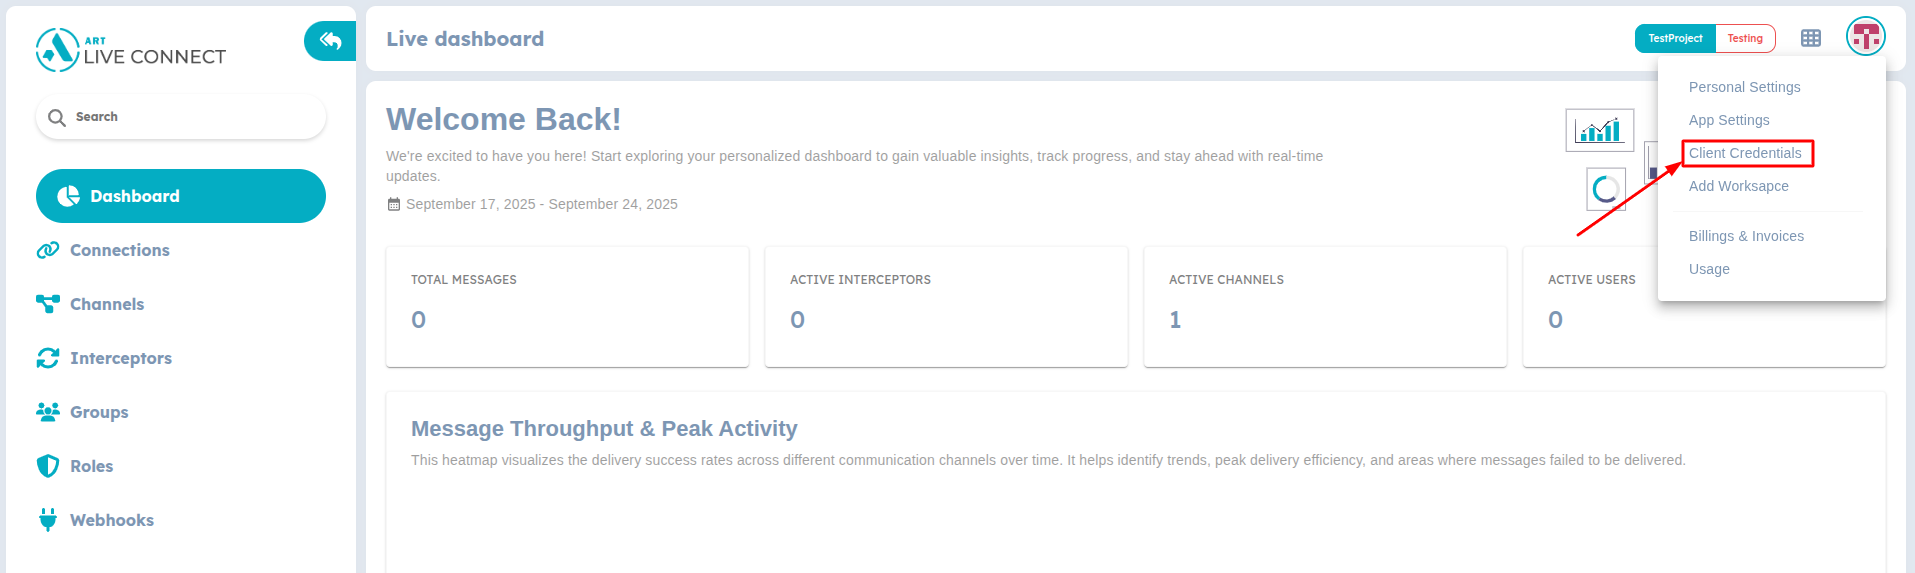
Profile Settings
- Click on Generate Key in the top right corner of the page.
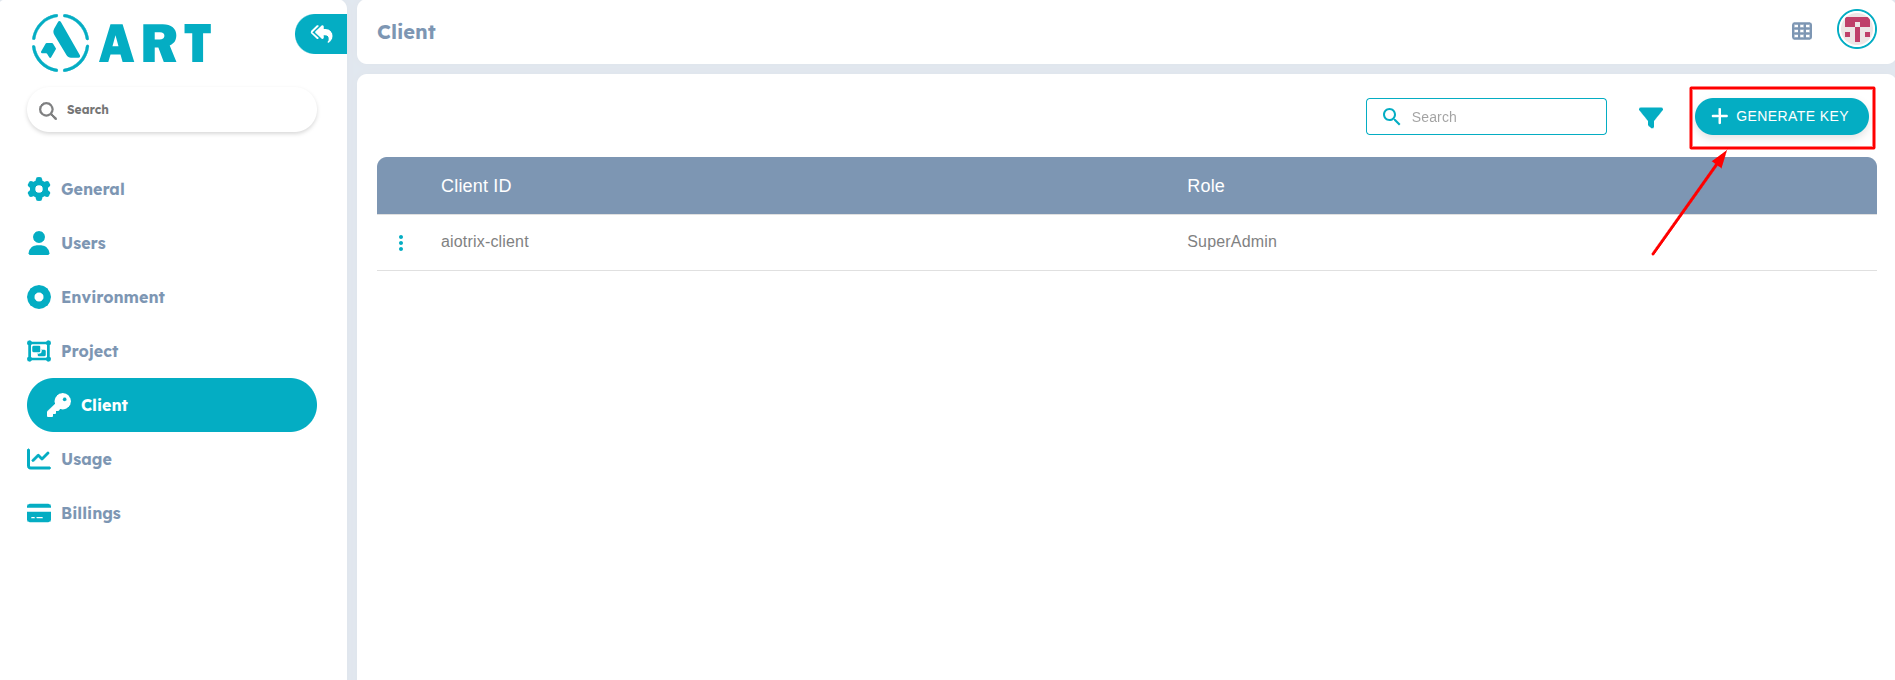
Generate Client Credentials
- A confirmation popup screen will appear; click Yes.
- You'll be able to copy or download the JSON format which contains the Client Secret Key and ensure you name the JSON file as adk-service.json.
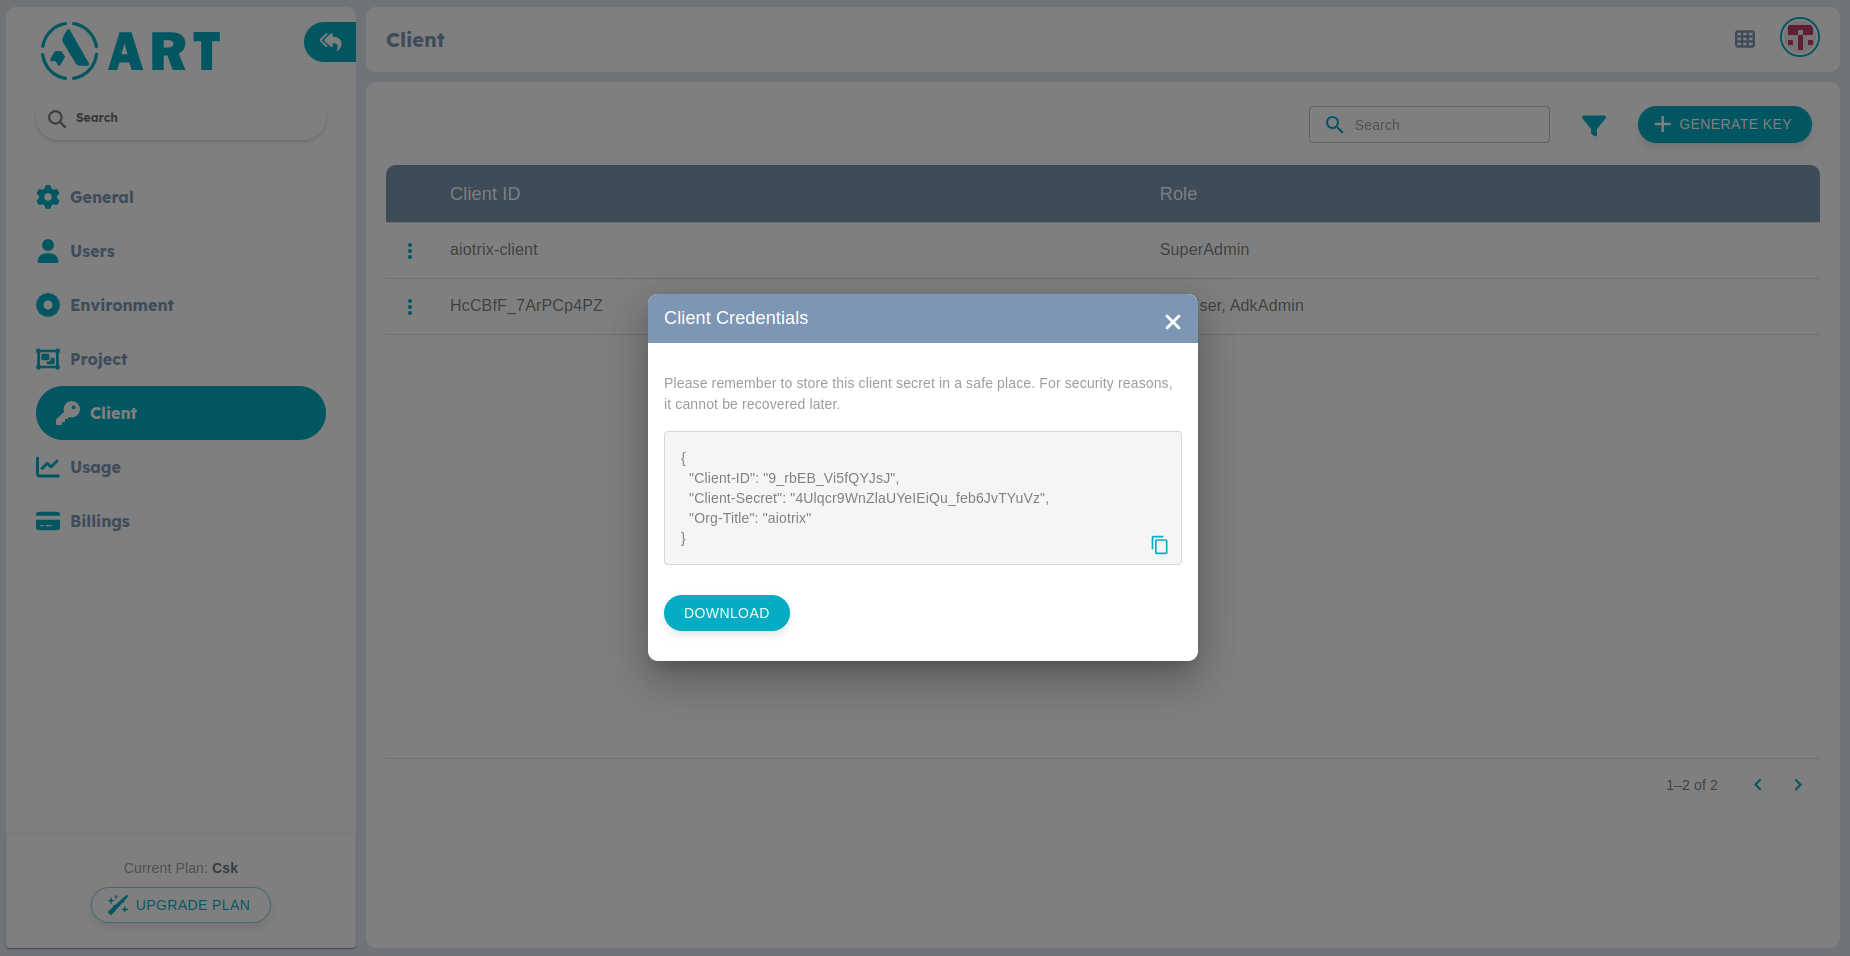
Client Credentials
When the Client Key is generated make sure that the credentials are either downloaded or copied. You will not get access to these credentials in later stage.
The JSON file should look something like this
{
    "Client-ID": "xxxxxxxxxx",
    "Client-Secret": "xxxxxxxxxxx",
    "Org-Title": "YOUR_ORG",
    "ProjectKey": "YOUR_PROJECT_KEY",
    "Environment": "YOUR_ENV_NAME"
};
ProjectKey and Environment keys won't be there in the JSON while downloading. They need to be updated manually.
- Place adk-service.json file at the root of the project directory.
- Roles determine the level of access and control that can be given to a credential. Depending on requirement and access needed, different roles can be assigned to the generated credentials.
When assigning roles to the generated credentials, ensure that only sever-side credentials has AdkAdmin role and do not give Admin rights to client credentials.